What you will need
· About 25cm of fabric – natural fabrics such silk or cotton work best. (Be careful if using fabric with some synthetic as the fabric may melt if tools are heated too much.
· French Flower tools – if you don’t have them, be creative – look in the kitchen drawers or the tool box
· Burner to heat tools - stove top, gas camp stove, spirit burner
· Foam block and cotton cloth to cover – foam should be about 10-12cm thick
· Florist wire (about 22 gauge)
· Florist tape
· Stamens
· Clear craft glue
· Fabric Stiffener
· Scissors
· Pliers
· Dressmaker’s pins
Stiffen the fabric
You can use straw stiffener (flammable and really smelly).
You can use the recipe from my previous post.
If you want a really simple and effective stiffener you can use PVA glue and water solution. Mix 1/3 PVA to 2/3 water in a bucket or large bowl. (PVA is a woodworking glue that you can buy from the hardware store.)
Scrunch the fabric up and dunk into the solution and make sure the fabric is really soaked. Wring out the fabric really tightly and then hang on the line to dry. Use pegs or weights on the bottom on the fabric in the corners to stop the fabric gluing together.
Hint – if you are doing a lot of stiffening of fabrics for flower making do your light colours first and then darker colours. Dye can sometimes run from darker fabrics.
Cut out your fabric using your paper patterns
Cut out all the petals and leaves. When pinning the pattern to fabric make sure pins are in the centre of the petal – the hole from the pin does not disappear so have the pin hole in a spot where it will not be obvious when finished.
Cut petals and leaves on the bias.
Hint: Always cut out 1 or 2 more petals and leaves than you need – sometimes the tool may be too hot and burn so in this way you have some spare. Sometimes you will want a fuller flower depending on the thickness of the fabric chosen.
If you don’t use them in this flower keep with other spares you will collect. It will be surprising how you can construct a hybrid flower from all your leftovers. The combination of the colours and textures of fabrics can be really interesting.
The leaves
Glue the florist wire onto the backs of the leaves so glue can dry while you are tooling the petals and constructing the flower. Place the wire in the centre of the leaf. Make sure the wire is glued to almost the top of the leaf.
Heat the knife tool. (If you don’t have one raid the kitchen drawer and look for a butter knife – ie one that is smooth and doesn’t have serrated surfaces.)
Once glue has dried place leaf wrong side down on flat hard surface (ie don’t use foam pad or sand bag). Run knife along the wire on each side of the wire. Make veins in the leaf – run knife from centre to the edge of the leaf.
Wire the leaves together by first overlapping two of the wired leaves and twisting the wire until there is no movement. Cut off extra wire from one wired leaf. Repeat with third leaf.

ttach leaves to flower by winding the wires of the leaves round the stem of the flower. Do this close up behind the flower and let about two-thirds of each leaf show beyond the flower - - this helps to have the flower sit a little flatter at the back when you are attaching to hats or when using as a brooch. Cut off extra wire.
Neaten this wire bunch by winding florist tape from the base of all leaves to the end.
Pressing the petals
Using foam pad (or sand bag if you prefer) place Petal 1 – right side down. Tool all petals on the wrong side of the fabric.
 |
Flower making tools on a sand bag
|
 |
| Offcut piece of foam wrapped in white cotton fabric. |
Hold the bottom of the petal with one hand and pull slightly while pressing the tool into the petal. This will form a “cup” in the petal. I used a ball tool of the appropriate size. I usually do this step to all of the petals then move onto the next part.
Use a tool to turn back the petals. I used a rats tail tool
 |
| L-R: Petal, cupped petal, reverse showing turn back |
Now comes the fun bit …. Assembling the rose
Assembling the Rose
You will need a 15 – 20 cm length of floral wire and some stamens.
Fold the stamens in half and loop the wire through the stamens. Wind the wire around the stamens so the stamens hold firm. The long wire will become the stem of the flower.
Use floral tape – start at the top, covering the wire round the stamens and then spiral them down.
The first few petals of the stems are now secured onto the stem by winding the cotton around a few times. Place the petal on – hold it in place and then wind several times with cotton to hold it in place.
Place the next petal on, overlapping half of the first petal. Hold this second petal in place and wind several times with cotton. Use the other small petals around the centre.
When winding on the cotton catch only a small amount of the petal at the bottom – about 3-5mm.
This winding isn’t always that easy at first. Hold the stem and the petal and wind slowly and firmly.
This by itself makes lovely little buds. These can be used as fillers.
Now attach the next size petals. I use glue at this stage rather than cotton. Just use a small amount at the bottom of the petal.
Be careful not to spread the petals too far down the stem
When the flower is finished hold the flower and see if any petals need a little extra glue to make them sit nicely.
Let the flower dry upside down.
Cut a small hole in the calyx. Put some glue on the back of the flower and slip the calyx up the stem of the flower and press it on the back of the flower.
Finish off by winding floral tape around the leaves and the stem. Use the pliers and pinch the back of the camellia (at the base) on the wire and fold the stem over. Cut off excess wire using pliers.
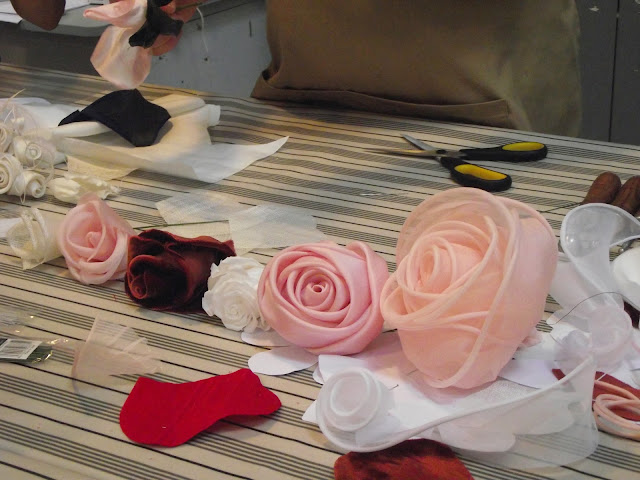
Here are some finished roses.


